Thursday, December 26, 2013

How to find your Android phone on a map

Updated 4 Feb 2018.
You don't need to load any apps for this. It just uses your google account.
  1. Open up an internet browser and go to https://www.google.com/android/find
  2. If you're not already signed in with your account, sign in. It must be the same account that you use on your phone. 
  3. You should see your device's location on the map. 

Sunday, December 8, 2013

Fixing a screw in the tire

Back toward the end of August, I noticed that my tire was getting low, so I put air in it. A few days later, I had to add air again. So I checked for leaks and found a screw in the tire.
Since it was small, I figured I'd try the same thing I tried before when I got a staple in the tire - RTV. This was three months ago when I did this repair. The tire still had plenty of life in it. In fact, I found the tires on the classifieds, so there was no road hazard warranty of any kind.

<legalese> In case you haven't figured it out yet, this is for informational or entertainment purposes only, and I can't be held responsible for what happens if you try this. </legalese>

But anyway, I've been riding on this repaired tire for the last three months and haven't had to add air yet. I just checked the pressure and it's still at 40 psi. (With this car and tire size, 40psi gives great wear and performance.)

So here's how I did it.
1. Jack up car so the tire is off the ground. (Support with jack stand. Okay, maybe I skipped the jack stand this time since I wasn't under the car, but they're great for safety.)
2. Remove screw.
3. Let all air pressure out of the tire.
4. Cram RTV into the hole.
5. Let it sit over night.
6. Pump up the tire.
7. The rest is self-explanatory . . . something about putting the car back on the ground.


How I cleaned up my foggy headlights

Chances are you also have a car with plastic headlights. As they age, are exposed to sunlight, rocks, dirt, heat, etc., the factory coating that protects the plastic wears off. Then the headlights start to look foggy. Not only that, it disperses the light instead of aiming it straight onto the road in front of you. 

You can clean off the oxidation and smooth out the damage and make your headlights look nearly brand-new. The problem is that if you don't re-apply an OEM style protective coating, you'll have to keep polishing them every three to six months. But that's still much cheaper than buying a new set.

There are several ways to polish headlights.

1. Go buy a kit and follow the instructions.
2. Look around the garage and see if you already have the required materials.

Let's try option #2. Do you have any clear plastic polish? Meguiars makes a nice one. Don't have any? How about some Turtle Wax polishing compound in the green tub? I've even heard that toothpaste works.

If the plastic is rock-chipped and rough, you can smooth out the damage with some 2000 grit sandpaper and water. When you're done with that step, the headlight will be all hazy. But don't worry. Now use the polishing compound on a cotton terry cloth and it'll be clear as glass in a minute or two.

Update: I tried the Meguiar's kit, and it works pretty well. The protectant is not the same as original. You still have to re-polish them about every six to eight months or so. Without the protectant, I need to re-polish the headlights every 3-5 months.

One of these days, I'll try clear spray paint to see what it does. I've heard people get good results with it. Even if it messes it up, I can fix it with some 2000 grit sandpaper and water.

Here's my before and after:


Update 9/19/2022: Now I just wet sand with 1000 grit and then clean & dry. Mask off and then shoot with a high quality clear coat and you're done.

How I refilled my toner for free using an old cartridge

Since my cyan toner cartridge (Brother TN-210C) was reading empty I decided it was time to try refilling it instead of paying about $70 for a new cartridge.

I ordered a set of toner in little individual bottles that came with one of each of the colors and two black refills. The whole set was about $25. But I didn't use any of it yet because I came up with a different plan.


The instructions said to empty the remaining toner, discard it, and then fill it with the new toner. I figured maybe the reason for discarding the old stuff was one of the following:
1. The new toner was materially incompatible with the old toner.
2. The new toner was a slightly different shade of cyan.
3. To make sure exactly 45 grams was going back in.
4. The toner salesman was against conservation.
5. His boss was holding a sales contest. 

Whatever the reason, I wanted to measure the amount remaining in the old cartridge. It was tough figuring out how to remove the plug without damaging it. I finally found that a 90 degree pick will work if you insert it along the side and rotate it so the angle part is against the bottom side of the plug. Then carefully pull hard and the plug will pop out, along with a puff of toner dust.


The plug wasn't made to come out. If you damage yours so that it won't hold toner in, you can get a rubber heater hose cap from your local auto parts store (shown above). The 5/8" size with 1/8" thick rubber will fit in the 7/8" opening. If you cut it to the right length, it should work just as well at keeping the toner in, plus it's easier to re-use than the original cap. 

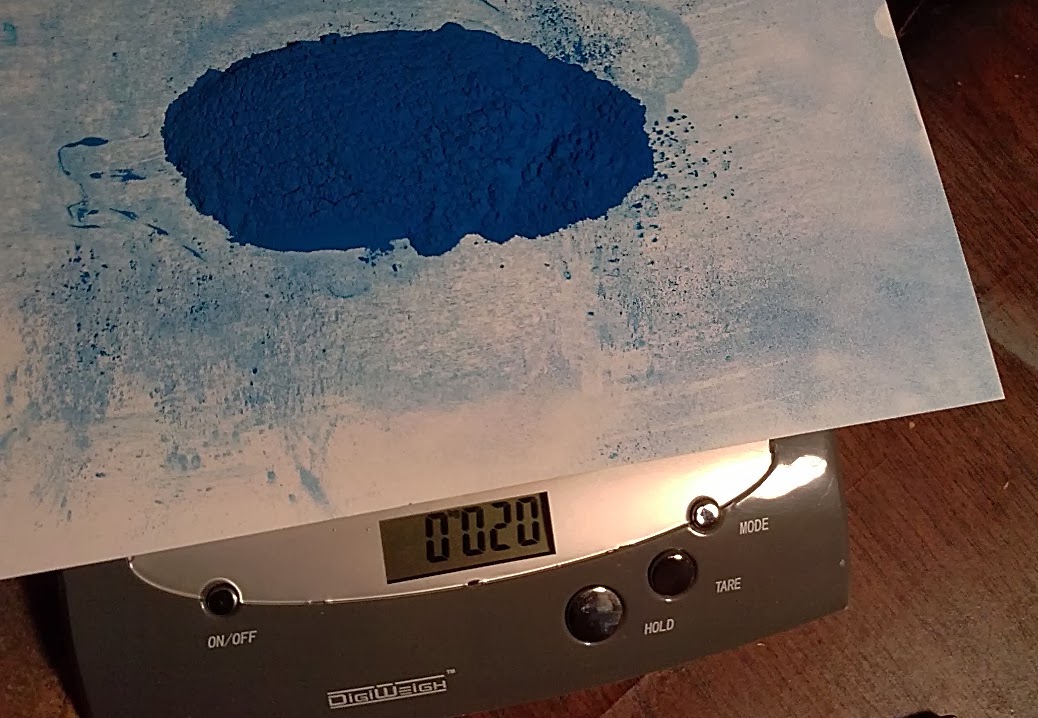
So I dumped the remaining toner on a clean sheet of paper and weighed it. The scale said there were 20 grams left over.


This got me curious. I was wondering how much was left over from the original starter cartridge. (Being the pack-rat that I am, and figuring I could try to re-fill it later, I saved it.) So I popped the plug out and dumped the contents onto the same pile.
I was kind of shocked that there was about 40g left over in the started cartridge, considering that the refill was only 45g. So I made the decision to save the new toner and just dump the pile back into the cartridge. I grabbed a funnel, wiped it clean, and dumped all 60g into the toner cartridge. I popped the plug back in the hole and reset the flag gear. 

Here's how to reset the flag gear:
1. Remove the two phillips screws shown here.

 2. This is the flag gear position for empty.

 3. Set the flag gear to this position to reset it. (It's about a quarter turn counter-clockwise from the empty position.)

After a test print, I saw that the cartridge was working perfectly.